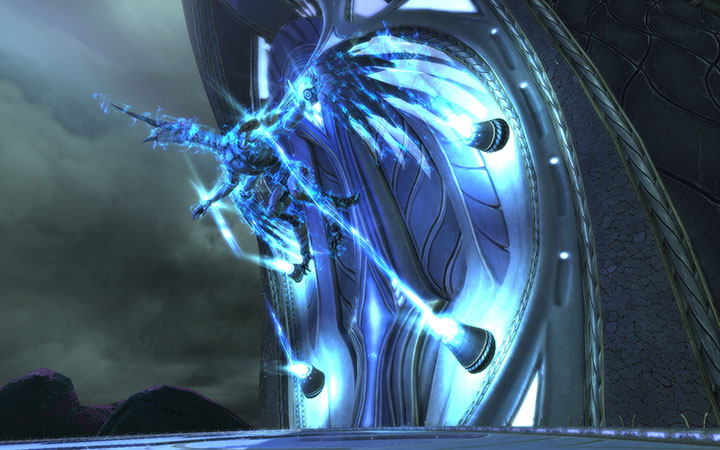
Crucia
Boss Information
Health: 456 million
Enrage Timer: 9 Minutes (10 Minutes on Hard Mode)
Difficulty: 9/10 (Good God the mechanics... They burn!)
DPS Requirement: 1.2 million
Enrage Timer: 9 Minutes (10 Minutes on Hard Mode)
Difficulty: 9/10 (Good God the mechanics... They burn!)
DPS Requirement: 1.2 million
Raid Setup
2 Tanks
1 ST Healer
3 Raid Healers
1 Bard/Oracle
1 Archon
12 ST DPS
1 ST Healer
3 Raid Healers
1 Bard/Oracle
1 Archon
12 ST DPS
Phase 1: 100%-80%
Boss Mechanics
Storm of Crucia: Constant AOE damage up the whole fight
Resistance: Stack debuff (stacks every second) that reduces max HP. Applied on the whole raid at the beginning of the fight (Phase 1) and phases 3 and 5. Stepping into the green bubble cleanses it.
Feedback: A cleansable debuff on a healer (The healer cannot cleanse himself). This needs to be cleansed by the other healers. The debuff reduces that healer’s heald and absorbs done by 25% and also applies a debuff to whomever they heal that reduces their damage done by 25%.
Locking on: A HUGE yellow AOE put on the person farthest away from the boss (Should be the OT). The tanks then need to swap and get ready for blink (See below).
Blink: The yellow AOE will turn red and Crucia will jump on the player who has it. Anyone(except the person she locked on) inside will receive approx. 120K damage. A wall will also spawn from the person she blinked on to the active tank (See the strategy section for phase 1). If she blinks backwards, she will kill alot of people. Again, see strategy section
Red AOES: This is why the raid needs to be in the positions in the strategy section. They not only do damage to anyone who is not inside that touches it, but they also apply a debuff that makes any bubble you get later get bigger.
Charged Breath: A channel the boss does after the first blink, then 2 more blinks, and then after 4 more blinks, etc. The breath destroys the walls she puts up when she blinks. This will one shot anyone she breathes on, so just keep her facing away from the raid.
Displacement: 2 players will be teleported to the other’s position. They need to run into the green or purple AOEs to stop this from happening.

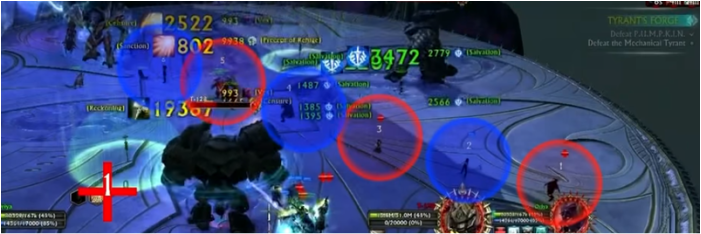
From Oria's Xu's Guide. Red = DPS, Green = Healers, Blue = Tanks
Phase 1 Strategy
Tank her facing AWAY from the raid where she is standing.. The tank that gets the yellow blink AOE needs to grab her and stay completely backed against the wall until the blink cast is finished. Other than that, it’s simply a matter of following mechanics and making sure the raid is cleansing themselves when they need to.
Phase 2: The Mechs (Strategy Included)
The Mech Mechanics
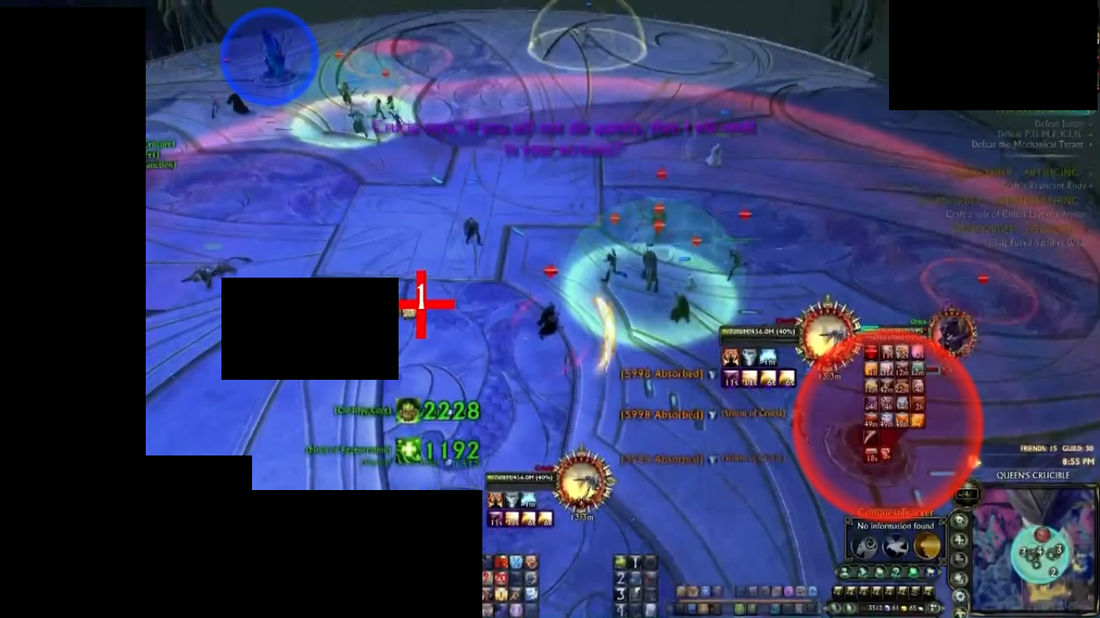
Everyone needs to go cleanse in the green at the start of the phase. 3 mechs will spawn. 2 of them, the TI-128s have proximity aggro so stay behind the tank. You do need to be in melee as well, because these bosses can only be DPSed in melee. If you attack them at ranged, they will pull you in and do heavy damage. Crucia casts a chain lightning effect (DPS to several people in a chain) and Storm of Crucia is still going. The TI-126 will cast Ethereal Barrier, which reflects on spell attacks. He can be attacked in ranged, though. Everyone in the raid will receive a positive/negative debuff. You can use the reactive you receive to change your polarity at any given time
Corrupt Feed: Crucia will cast this on a random mech. It will be shielded from damage. If she finishes the cast, she will wipe the raid. To stop this, you have to form a line from the pillar behind the mech to the opposite side and ALTERNATE polarities. For example, if the person in front of the mech has negative polarity, the person behind him should have positive and so on. This will pass the “Grounding” AOE to the mech.
Corrupt Feed: Crucia will cast this on a random mech. It will be shielded from damage. If she finishes the cast, she will wipe the raid. To stop this, you have to form a line from the pillar behind the mech to the opposite side and ALTERNATE polarities. For example, if the person in front of the mech has negative polarity, the person behind him should have positive and so on. This will pass the “Grounding” AOE to the mech.
Oria's Picture. The blue and red are alternation positive and negative charges.
Phase 3: 80%-40%
Boss Mechanics
Exactly the same as phase 1 (Except on Hard Mode; See that section below)
Phase 4: The Crystals (Strategy Included)
The Crystal Mechanics
At the start of this phase, everyone will receive a polarity again. 2 crystals will spawn, one positive on the left and one negative on the right. If you have to positive polarity, you need to run to the negative crystal, and if you have the negative polarity, you need to run to the positive crystal.You need to avoid these.You also need to stand inside of the blue circles that spawn. These circles apply a stack of a buff on you that allow you to do damage to the opposite crystal. These stacks ALSO increase the damage you take from Storm of Crucia (Damn that storm). On normal mode, you can take up to 7 stacks. You will also see 3 laser walls spawning. Have 2 players with the lowest health carry the green bubbles. They will need to stand and hold the green bubbles where the walls cross. The other players can only cross the walls at this location. The walls are bigger than they look and will one shot anyone within 1-2 meters of them. The green bubble takes 1 second to apply the immunity buff so the player can cross, so don’t immediately run through it. Both crystals have to die within 8 seconds of one another. If you fail to kill them within this time, or Crucia’s crystal buff disappears, the raid will receive a debuff that increases everyone’s HP based on how much health the crystal had left.
Oria's picture to show the crystals. Red = Negative and Blue = Positive
|
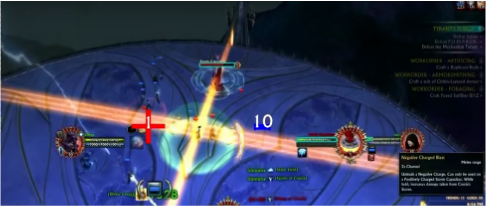
How the players with green bubbles should hold them and where to stand
|
Phase 5: 40%-0%
Boss Mechanics
Exactly the same as phase 1 and 3 (even on hard mode). You need to make sure you are cleansed with the green bubble BEFORE she hits 7% HP when she casts Polar Reversal.
Polar Reversal: This turns the green bubbles red, and touching them will one shot you. This happens at 7%.
Polar Reversal: This turns the green bubbles red, and touching them will one shot you. This happens at 7%.
Hard Mode
- The enrage timer is 10 minutes
- the raid takes more damage
- You need 2 stormcaller/Dominator hybrids to reflect the TI-126 as his AOE damage can wipe the raid.
- Using the reactive you receive to change polarity will give the entire raid a debuff that increases their damage taken by Storm of Crucia, which will probably wipe you. So don’t use it. At all.
- If a player dies, a vortex spawns that remains the entire fight
- Overcharged: Added mechanic is phases 3 & 5. It will happen every 25 seconds.The player who receives this debuff will be dropping 9 AOEs and has a reactive.The player needs to drop them on the edges of the room. They get bigger after each one is dropped. The reactive will teleport you back to the starting point.
- In phase 4, you can only take 5-6 stacks of the polarity buff on hard mode.
Loot Table
The loot table is complete, but is pending beautification. Please forgive our mess.
2 Cloaks
1 Heart of the Frozen
1 Tyrant's Anvil (4,000 Abyssal Crusader Marks)
Cloaks
Mecha-Wing Cloak - Warrior DPS - AP130
Enforcement Cape 209 - Warrior Tank - GD126
Wrath of Heaven's Fire - Cleric DPS - SP129
Tombstone of the Celestials - Cleric Tank - GD126
Scaled Claw Cape - Rogue DPS - AP125
Weave of Mechanical Rebirth - GD126
Cape of the Feigned - Mage DPS - SP127
Cloak of Nullified Magic - Mage Tank - GD126
Threngar's Weapons - Crucia has a small chance of dropping a weapon from Threngar's loot table (Mount Sharax) as seen below:
Fist of Threngar - Warrior DPS (1H) - PC161/CP219
Senblade, Reality's End - Warrior DPS (2H)- CP492
Rakure Re, Singularity's Forge - Cleric DPS (2H) - SC321/CP438
Keystone of the First Prison - Cleric AoE Heals (OH) - SP2498/CP242
Ekor Ira, Hand of Threngar - Cleric ST Heals (1H) - SP2635
Draum Ra, the Rising Shadow - Rogue DPS (1H) - CP250
Hadroth Ir, the Lost Dream - Rogue Tank (1H) - Guard119
Shij Ir, the Gatherer of Shadows - Mage ST Heal (1H) - SP2635??
Dre Senra, Devourer of Light - Mage DPS (2H) - SP5123/CP438
Ia Re, Eye of the Nexus - Mage AoE Heal (OH) - SP2636
Ajika Ea, the Fate Weaver - Mage Tank (2H) - Guard301
