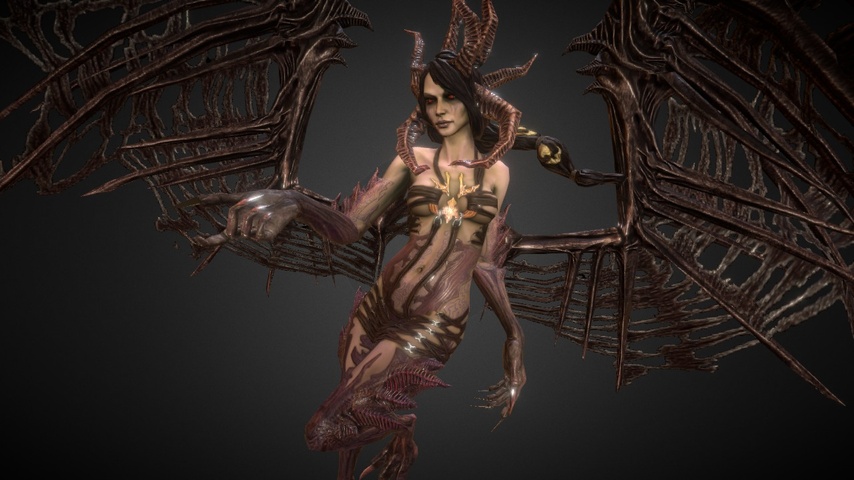
Estrode
Boss Information
Health: 387.8 M (5/4/16)
Difficulty: 4/10
Enrage Timer: 12 Minutes
Required DPS: ~1 Million
Difficulty: 4/10
Enrage Timer: 12 Minutes
Required DPS: ~1 Million
Raid Setup
- 1 Tank
- 1 ST Healer
- 2 Raid Healers
- 1 Bard/Oracle
- 1 Archon
- 14 DPS (Ranged recommended for progression)
Single Phase Fight
Boss Mechanics
Once engaged adds will spawn around the room. Each is a specific soul class. Estrode will be consuming 3 souls roughly every 30 seconds, so you need to make sure that she will not consume the most deadly ones. Normally you need to kill only the bad ones and let her consume the others, so you dont lose much dps.
Depending on which souls she consumes she will cast different abilities, debuffs and such. It is imperative for the healers to keep the raid cleansed at all times.
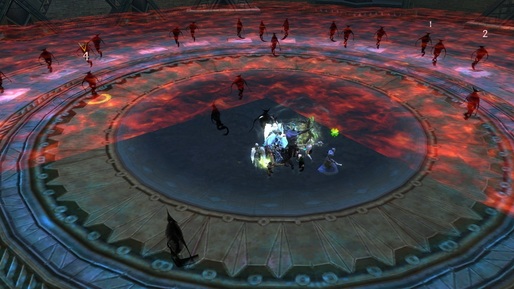
The room is going to be split in 4 quarters. 3 Quarters will have AOE in the ground so you need to stand in the safe one. Then move to the next safe. The rotation is anti-clockwise and the first safe one is exactly the one at the entrance of the room. The tank can ignore this.
Estrode will randomly stun 3 people at a time. This can't be cleansed but removed with Break Free and similar abilities.
Strategy 1
Tank her in the middle of the room facing away from the raid. Everyone else is standing behind her in the safe zone rotating around every quarter. Assign 3 people with pull abilities (e.g. Seargents Order, Squall) and use the macros provided in Set 1 below to pull three souls at a time for Estrode to consume. Subsequently you can use these as well to pull unwanted souls away from her.The first macro set is built to contain only the ones she is allowed to consume. Have everyone else DPS the boss. You do not need any AOE DPS. Melee is an option. Have the healers and bard stand furthest in the back to catch certain mechanics. This strategy is uncommon due to the requirement of more coordination, a tighter DPS check and increased situational mechanics.
Strategy 2 - Cheesing it
This is the most common strategy these days because you can trade kill speed for ease of mechanics.
Assign 3 AOE DPS. Assign 4 pulls (e.g. Seargents Order, Squall, (Druide works to, but not recommended due to damage loss)).
Use the macros provided in Set 2 to pull the unwanted souls into the middle. Estrode is tanked outside near the edge of the room facing away from the raid.
You will have 5 cycles of pulling adds inward. Everyone starts DPS on these eventually killing all the unwanted souls. This should take at most ~2-3 minutes. You're left with the souls she is allowed to consume at which point you can just DPS her down and ignore this mechanic. Don't stand in range of the adds (1-2m).
During the pull phase the tank needs to be careful about which souls are close to Estrode and move around accordingly. Again, the tank can ignore the AOE splitting the room in quarters. This requires practice.
Depending on which souls she consumes she will cast different abilities, debuffs and such. It is imperative for the healers to keep the raid cleansed at all times.
The room is going to be split in 4 quarters. 3 Quarters will have AOE in the ground so you need to stand in the safe one. Then move to the next safe. The rotation is anti-clockwise and the first safe one is exactly the one at the entrance of the room. The tank can ignore this.
Estrode will randomly stun 3 people at a time. This can't be cleansed but removed with Break Free and similar abilities.
Strategy 1
Tank her in the middle of the room facing away from the raid. Everyone else is standing behind her in the safe zone rotating around every quarter. Assign 3 people with pull abilities (e.g. Seargents Order, Squall) and use the macros provided in Set 1 below to pull three souls at a time for Estrode to consume. Subsequently you can use these as well to pull unwanted souls away from her.The first macro set is built to contain only the ones she is allowed to consume. Have everyone else DPS the boss. You do not need any AOE DPS. Melee is an option. Have the healers and bard stand furthest in the back to catch certain mechanics. This strategy is uncommon due to the requirement of more coordination, a tighter DPS check and increased situational mechanics.
Strategy 2 - Cheesing it
This is the most common strategy these days because you can trade kill speed for ease of mechanics.
Assign 3 AOE DPS. Assign 4 pulls (e.g. Seargents Order, Squall, (Druide works to, but not recommended due to damage loss)).
Use the macros provided in Set 2 to pull the unwanted souls into the middle. Estrode is tanked outside near the edge of the room facing away from the raid.
You will have 5 cycles of pulling adds inward. Everyone starts DPS on these eventually killing all the unwanted souls. This should take at most ~2-3 minutes. You're left with the souls she is allowed to consume at which point you can just DPS her down and ignore this mechanic. Don't stand in range of the adds (1-2m).
During the pull phase the tank needs to be careful about which souls are close to Estrode and move around accordingly. Again, the tank can ignore the AOE splitting the room in quarters. This requires practice.
Useful Macros
Set 1 - Strategy 1
Target Macro:
Pulls 1-6:
---------------
target blade dancer
target cabalist
target harbinger
Mark 1
target assassin
target oracle
target physician
Mark 2
target warlock
target champion
target liberator
Mark 3
target saboteur
target dominator
target tempest
Mark 4
target pyromancer
target arbiter
target tactician
Mark 5
target shaman
target archon
target riftblade
Mark 6
target Estrode
Pulls 7-9:
---------------
target marksman
target necromancer
target reaver
target void knight
target sentinel
target justicar
target nightblade
Mark 7
target purifier
target bard
target riftstalker
target beastmaster
target warden
target inquisitor
target warlord
Mark 8
target Chloromancer
target paladin
target druid
target elementalist
target ranger
target stormcaller
target paragon
Mark 9
target Estrode
Set 2 - Strategy 2 - Cheesing It
First pull cycle:
targetexact Lost Riftstalker Soul
mark 1
targetexact Lost Blade Dancer Soul
mark 2
targetexact Lost Inquisitor Soul
mark 3
targetexact Lost Chloromancer Soul
mark 4
Second pull cycle:
targetexact Lost Defiler Soul
mark 1
targetexact Lost Druid Soul
mark 2
targetexact Lost Reaver Soul
mark 3
targetexact Lost Bard Soul
mark 4
Third pull cycle:
targetexact Lost Necromancer Soul
mark 1
targetexact Lost Purifier Soul
mark 2
targetexact Lost Pyromancer Soul
mark 3
targetexact Lost Nightblade Soul
mark 4
Fourth pull cycle:
targetexact Lost Marksman Soul
mark 1
targetexact Lost Elementalist Soul
mark 2
targetexact Lost Beastmaster Soul
mark 3
targetexact Lost Stormcaller Soul
mark 4
Fifth pull cycle:
targetexact Lost Ranger Soul
mark 1
targetexact Lost Void Knight Soul
mark 2
Partially Credit to raidthemall@Zaviel. Thank you for posting your guides! They are a huge help.
Loot Table
The loot table is nearly complete, but is pending beautification. Please forgive our mess.
NOTE 2: Matron Zamira, Estrode and Sicaron share partial loot tables for Offhand items. Identifying with an M/S/E depending on which boss we've seen the item on so far.
Belt
Girdle of Runed Might - Warrior DPS - CP146
Soulrender's Waistguard - Warrior Tank - GD134
Waistguard of Carnage - Cleric DPS - CP225
Bindings of Runic Warding - Cleric Tank - GD122
Undertaker's Tattered Wrap - Rogue DPS - AP84
Viscous Deflection Belt - Rogue Tank - GD287
Cinch of the Soulshaper - Mage DPS - SP124
Sash of the Grand Arcanist - Mage DPS
Off-Hand
M/S/E - Runeguard War Mallet - Warrior DPS 1H Mace - AP137
M/S - Aberrant Wall of the Garrison - Warrior Shield - GD165
M/S - Debased Runeking's Crest - Warrior Shield - BL330
M/S - Chalice of Darkness - Cleric DPS Totem - SP2719/CP263
M/S - Symbol of Omens - Cleric DPS Totem - SP2872
M/S - Channeler of Woe - Mage DPS - DPS669 SP2882
S - Shielded Greatspear - Primalist Tank - BL569
M - Basion of Lost Hope - Cleric Tank - BL322
M - Runeguard's Last Stand - Cleric Tank - GD158
M - Runeguard Twinblade - Rogue DPS - DPS836.7 AP137
M - Rune Vessel Fragment - Mage DPS - DPS669 SP2719/CP246
E - Glaive of the Betrayed - Warrior DPS - CP536
E - Ward Breaker - Cleric DPS 2H Hammer- SP5439/CP559
E - Warped Rune-Staff - Cleric DPS 2H Staff - SP5690
E - Runeguard Longblade - Rogue DPS - AP137
E - Recovered Greatspear - Primalist - PC644
E - Column of Housed Souls - Mage DPS 2H Staff - SP5746
HTML Comment Box is loading comments...
