Temple of Ananke
Boss List
Gristlespit
Hangover: Increases outgoing damage. Stacks.
Rabid Spittle: Reduces movement speed by 70%. Cleansed by Faeri Circle.
Faeri Circle: Cast by Tasuil. Small AOE effect. Clears Rabid Spittle.
Furios Flailing: Cleave over 10 seconds.
Aggressive Charge: Charges a player and instantly kills them unless a barrel is picked up (or through healing cooldowns).
Death Rage: Heavy cleave damage (and heavy tank damage). Cast on 10% health.
Spread a little to avoid multiple people getting hit by Rabid Spittle. The boss should be turned away from the group because of Furios Flailing. When he charges a player, that player either needs to pick up a barrel of booze lying around somewhere in the arena or be saved by a healing cooldown. Tank damage is high during Death Rage.

Killthraxus
Hardened Stone: Resistance to damage on the Obsidian Pillar. 5 stacks. Cleared by a Lit Barrel dropped by a Bombardier Goblin.
Crazed Imp: Add. Spawns throughout the fight. Applies Bloody Rend (bleed damage).
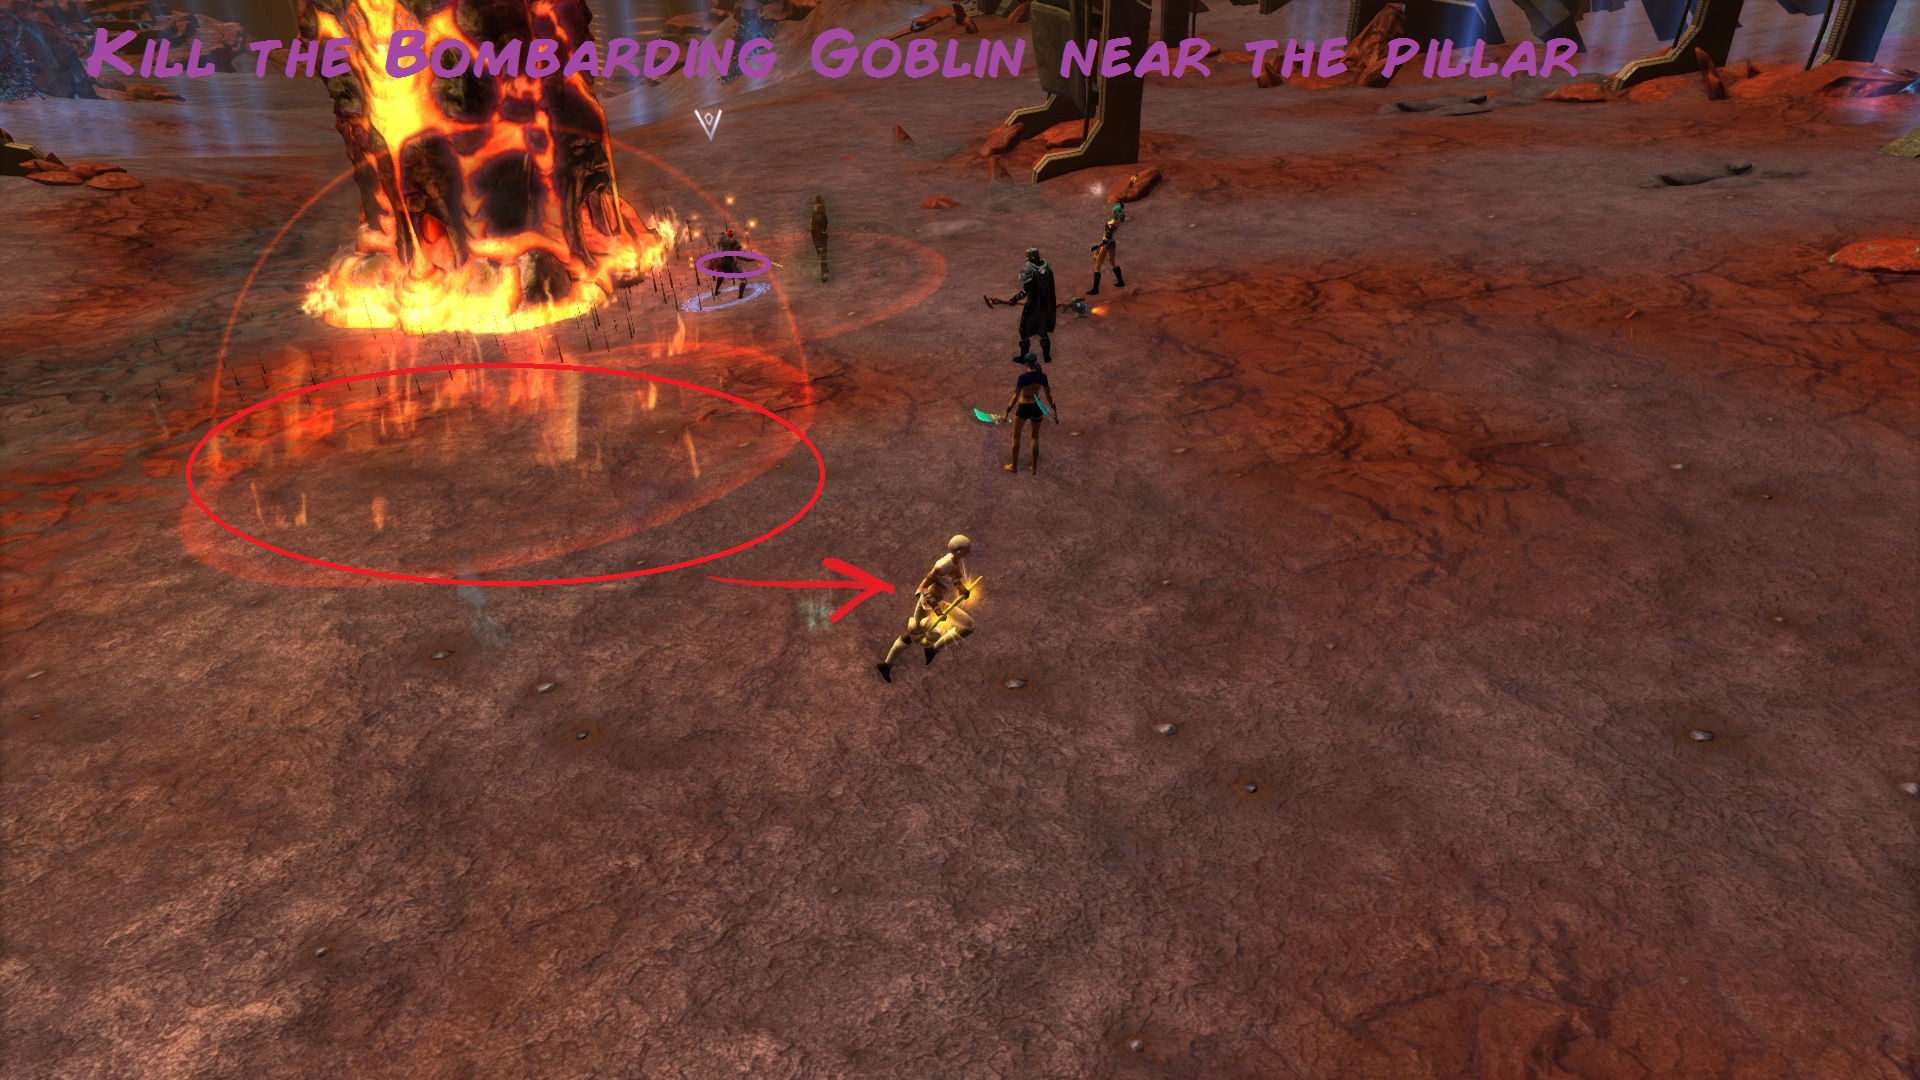
Bombardier Goblin: Add. Spawns throughout the fight. Carries Lit Barrel .
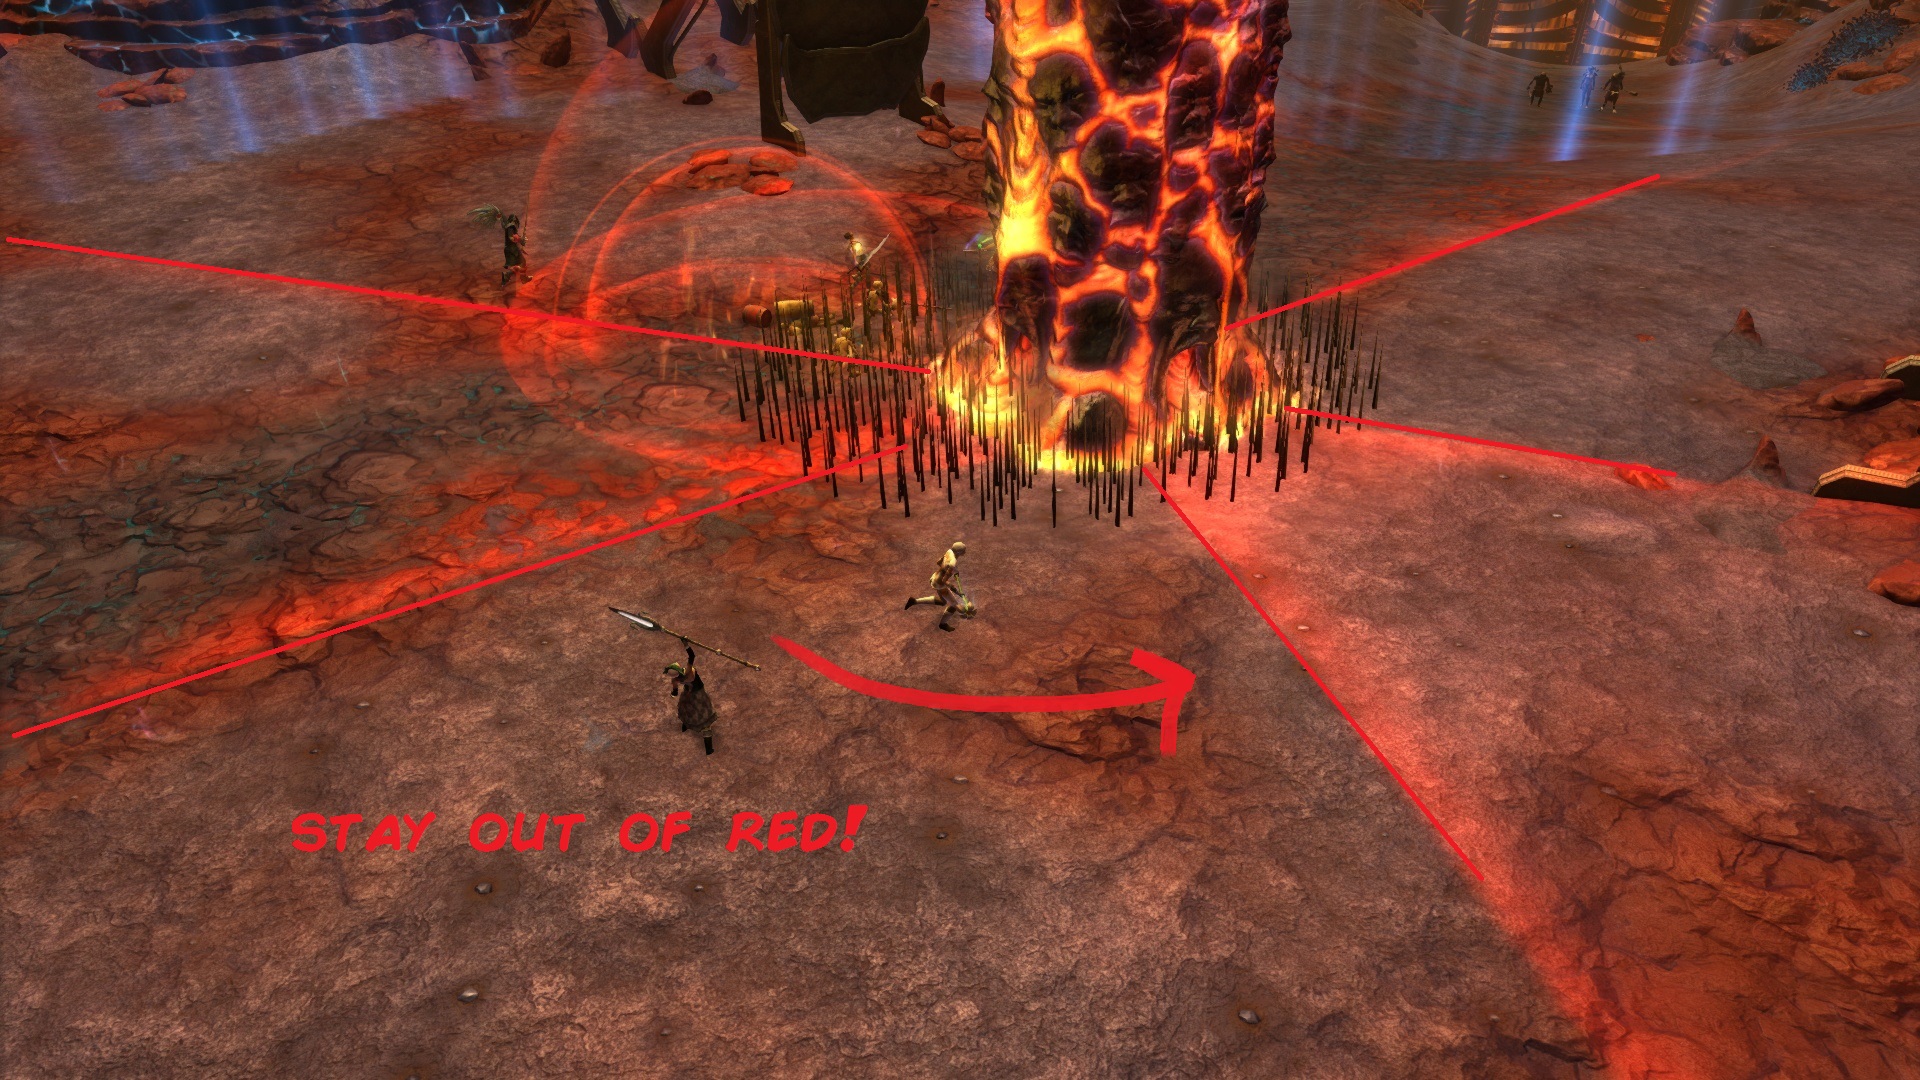
Spike Trap: Spikes shooting out of the ground.
Draconic Flame: Fire AOE.
The tank needs to pick up the adds. Stay out of any AOE effects. Kill the Bombardier Goblin near the pillar and let the barrel clear the stacks off the pillar (and damage it). When 5 stacks have been removed the pillar will be dead and the boss joins the fight. There will be no added mechanics from this point on. Kill the boss to complete the encounter.
Crazed Imp: Add. Spawns throughout the fight. Applies Bloody Rend (bleed damage).
Bombardier Goblin: Add. Spawns throughout the fight. Carries Lit Barrel .
Spike Trap: Spikes shooting out of the ground.
Draconic Flame: Fire AOE.
The tank needs to pick up the adds. Stay out of any AOE effects. Kill the Bombardier Goblin near the pillar and let the barrel clear the stacks off the pillar (and damage it). When 5 stacks have been removed the pillar will be dead and the boss joins the fight. There will be no added mechanics from this point on. Kill the boss to complete the encounter.
Lord Draveneaux
Vortalon: Dragon in the sky. Occasionally breathes fire. Deals damage to players and NPCs alike.
[Fire Death bubble of great death]: AOE. Spawns a red bubble aoe on a random player. Kills within 2-3 hits. Move out!
Infernal Bulwark: Protects Lord Draveneaux from Vortalon's attacks. Can be killed.
Heavily Armored: Reduces elemental damage by 90%. Removed by Vortalon and Caustic Shards. Can be killed.
Volcanic Aspirator: Reduces damage from Caustic Shards. Can be killed.
Super Heated: Increases damage from Caustic Shard. Applied by Vortalon's fire breath.
Caustic Shard: Spawn around the area, radiate damage. Cleave these if you get the chance.
Scale Breaker: Channeled on Tasuil. Does damage.
Kill the Infernal Bulwark and then the Volcanic Aspirator to expose the boss. Have him stand near Caustic Shards and at the same time in the fire AOE while the group avoids these. Super Heated in combination with Caustic Shard will remove the last barrier from the boss. If you manage to do so you can greatly speed up the fight by keeping these debuffs active on him (requires managing the Caustic Shards and movement). Be sure to heal Tasuil after Scale Breaker and when the fire should damage him.

Maelfernus
Raging Aura: Deals damage. Cleansed by Aura of Life (from Tasuil).
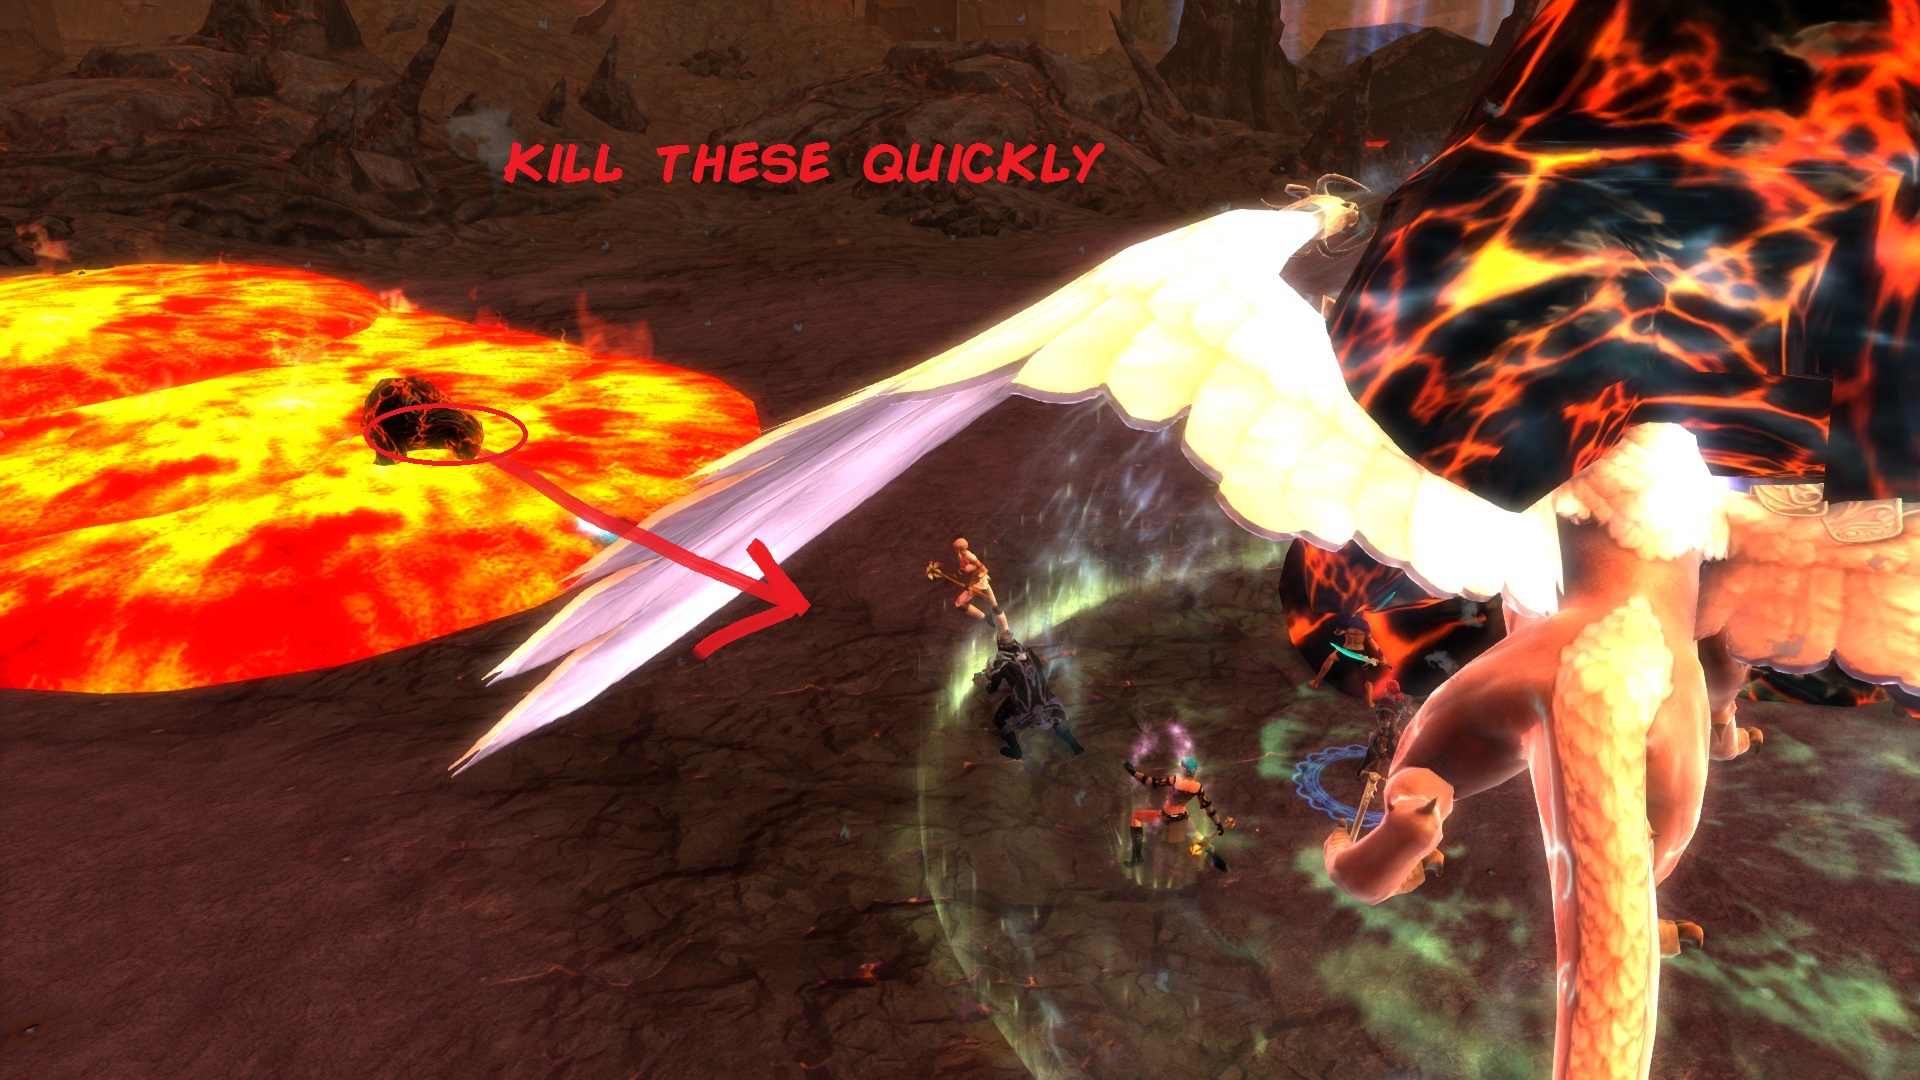
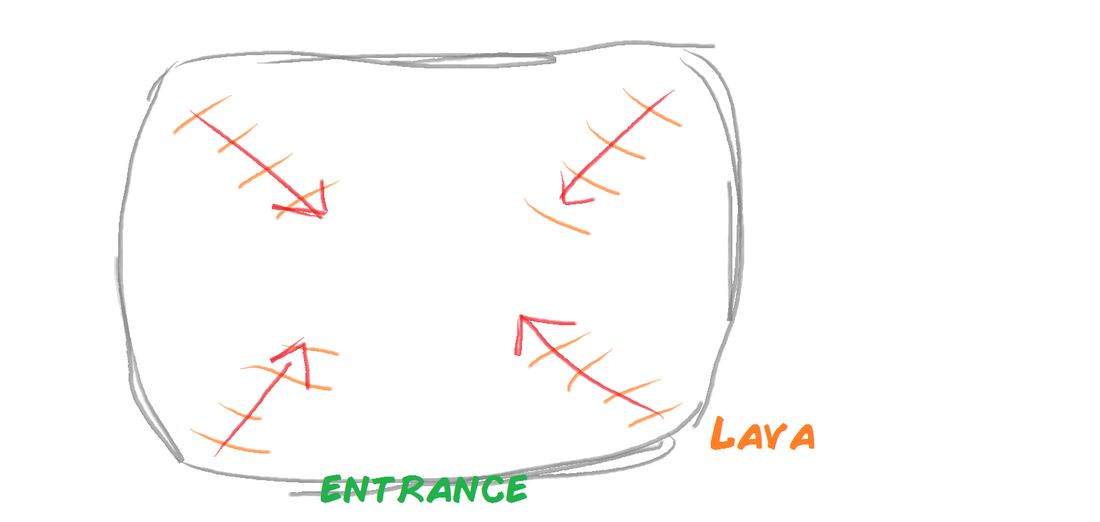
Summoned Essence: Add. Approaches from eany of the four edges of the room leaving a lava trail.
Poison Breath: Deals damage to Maelfernus and Summoned Essences.
[Knockback]: Knocks enemies and players back.
Stand near Tasuil to cleanse Raging Aura. Kill the Summoned Essences and don't let them reach Tasuil. If they do, try to heal Tasuil. If he dies, the fight will reset. In an attempt to knock back the boss and the adds Tasuil will occasionally knock the group out of his protective area.
Ananke
There are two ways of completing this encounter. Either just kill Ananke or turn Tasuil good again and then fight Ananke (which is much quicker).
Maeldroth: Tasuil's evil alter ego. Cleaves.
Poison Breath: AOE.
Burning Corruption: Keeps Maelderoth Evil. Stacks. When all stacks have been removed applies Conflicting Power.
Conflicting Power: State of paralysis. Can't attack or move.
Flames of the Prophet: Deals damage to near players and applies Burning Corruption. Succeptible to slow effects.
Soul Flare: 5s cast. Interrupt.
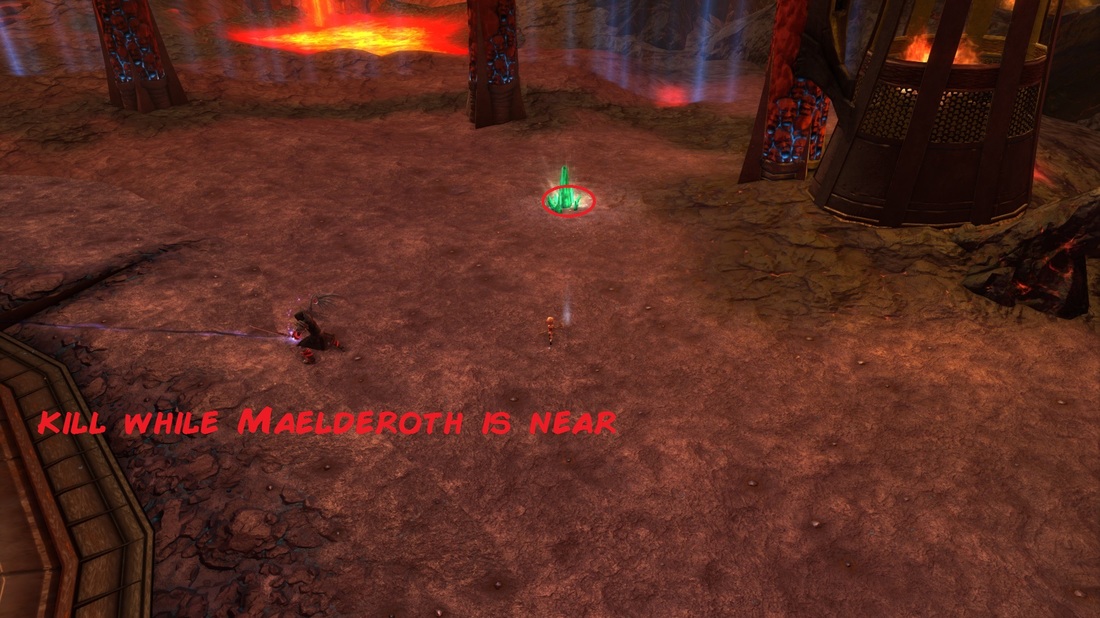
Life Shard: Removes 2 stacks of Burning Corruption from Maelderoth if he is within 30m of one when it dies.
Start the fight by damaging Maelderoth but not killing him. The fight will reset when he dies. Wait for Ananke to spawn and have one player kite her around the room. She mustn't stand near Maelderoth or she will apply more stacks of Burning Corruption. Be sure to interrupt her throughout the entire fight and stay out of any AOE. Kill the Life Shards to remove Burning Corruption from Maelderoth. As soon as he is under the influence of Conflicting Power Ananke will be inactive for a brief period. Just wait it out and heal through (heavy group damage). Ananke will then rejoin the fight. She will take much more damage now.
If you opted not to save Tasuil. Damage him until Ananke joins the fight while not killing him. Then just kill Ananke and mind the mechanics. This will take much much longer but does not require coordination.
Maeldroth: Tasuil's evil alter ego. Cleaves.
Poison Breath: AOE.
Burning Corruption: Keeps Maelderoth Evil. Stacks. When all stacks have been removed applies Conflicting Power.
Conflicting Power: State of paralysis. Can't attack or move.
Flames of the Prophet: Deals damage to near players and applies Burning Corruption. Succeptible to slow effects.
Soul Flare: 5s cast. Interrupt.
Life Shard: Removes 2 stacks of Burning Corruption from Maelderoth if he is within 30m of one when it dies.
Start the fight by damaging Maelderoth but not killing him. The fight will reset when he dies. Wait for Ananke to spawn and have one player kite her around the room. She mustn't stand near Maelderoth or she will apply more stacks of Burning Corruption. Be sure to interrupt her throughout the entire fight and stay out of any AOE. Kill the Life Shards to remove Burning Corruption from Maelderoth. As soon as he is under the influence of Conflicting Power Ananke will be inactive for a brief period. Just wait it out and heal through (heavy group damage). Ananke will then rejoin the fight. She will take much more damage now.
If you opted not to save Tasuil. Damage him until Ananke joins the fight while not killing him. Then just kill Ananke and mind the mechanics. This will take much much longer but does not require coordination.