Pagura
Boss Information
Health: 194.9 M (5/5/16)
Enrage Timer: 8 Minutes, 30 Seconds
Difficulty: 6/10
DPS Requirement: 700K
Enrage Timer: 8 Minutes, 30 Seconds
Difficulty: 6/10
DPS Requirement: 700K
Raid Setup
- 2 Tanks
- 3 Healers: 1 ST and 2 Raid
- 2 Support: 1 Bard and one Chon Hybrid
- 1 Defiler
- 12 DPS: ST
Phase One: 100%-40%
Boss Mechanics
Bounded Swipe: Boss main attack. High damage frontal cleave. 10m range. Avoid.
Thwarted Rage: Shared cleave mechanic. Reduces incoming damage. Triggered when Bounded Sqipe hits less than two targets(tanks).
Slice: Deals damage.Hits the active tank.
Second Slice: Deals damage. Hits the second person in the aggro table (offtank).
Nerve Pinch: Tank swap mechanic. Nerve Pinch will reduce the active tank's maximum HP by 90% for 5 seconds.Tank affected by Nerve Pinch will be immune to Bounded Swipe for the duration of the debuff. Swap with AOE taunt to pick up Sourbites.
Leaping Contagion: Chain AOE mechanic. Spread out to reduce damage or build camps of 3. Hits 5 people total. Lethal after third jump.
Curse of 4/5: Boss centered-ground AOE. Curse of 4/5 will cast 4/5 red areas on the floor, respectfully. You will need at least 4-5 players to stand on each one of those "pizza slice" shaped red areas. Having each pizza slice apply Cursed to at least one player prevents Hex of Failure.
Cursed: no longer present/time reduced (3.6#4) Increases the damage of Curse of 4/5 by 100%.
Hex of Failure: "Pagura is free to unleash a Hex" Raid damage. Applies Hex Frailty debuff on the whole raid. Triggers by failing Curse of 4/5.
Hex Frailty: 2 minute debuff. Doubles the damage of Hex of Failure.
Shattering Roar: "Pagura begins drawing in its breath, disturbing the Ice Souls." AOE wipe mechanic. 15 seconds cast time. Will kill everyone in line of sight at the end of the cast. Players need to kill an Ice Soul and LoS the boss behind the pillar that
spawns.
Add Mechanics
Ice Soul: 10 million HP. Ice Soul spawns neutral, activated by attacking. Once activated, they attack with Cold Snap.
Cold Snap: Hits high every 3 seconds. Activating more than one Ice Soul results in a wipe. Ice Souls spawn when Pagura starts to cast Shattering Roar.
You have 15 seconds to DPS an Ice Soul. A Pillar will spawn in its location upon death.
Ice Column (pillar): You need to LoS behind this pillar in order to survive Pagura's Shattering Roar.
Ice Shards: "The Ice Column begins to vibrate at a high frequency". 2 seconds after Shattering Roar the pillar explodes. Deals damage around it. Avoid.
Scour Nest: 265K HP
Hardened Shell (Buff): Immune to all attacks except Pagura's cleave.
Spawns Scourbites until destroyed (Use cleave to destroy these).
Scourbite (Spiders):
These spawn in nests in packs of three. Their auto attack deals around 11K damage. Each attack stacks a debuff that increases the damage taken by 10%. MUST be picked up by tanks, or you will lose your healers.
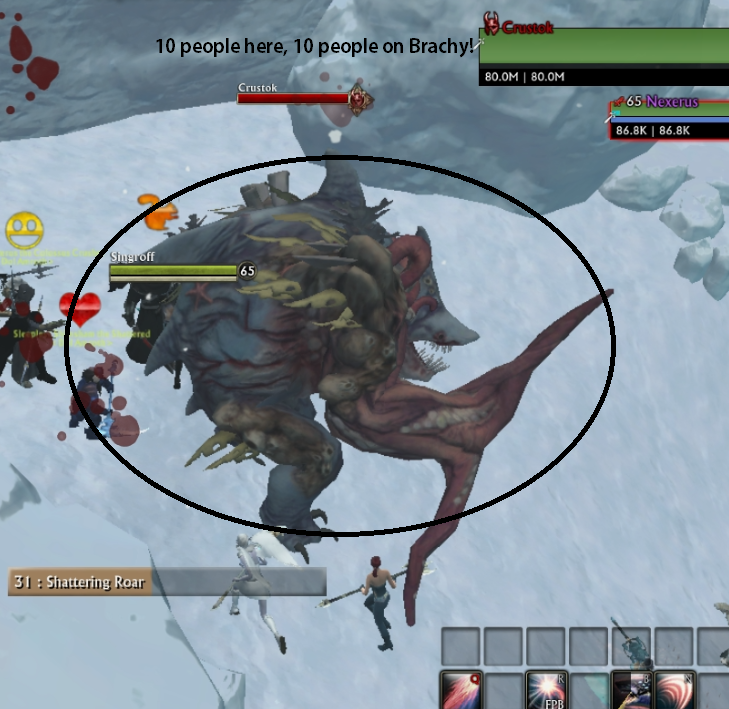
Phase Two: Brachy and Crustok
Add Mechanics
The adds are called Brachy and Crustok. They spawn on opposite sides of the room, and they have the same mechanics. Pagura is inactive during this phase.
Fortified Shell: 15 second shield buff on Brachy and Crustok (See below for info). Both shields need to be destroyed before expiration. Failure to destroy shields will apply Fortified Body to the add whose shield expired.
Fortified Body: Permanent buff on Brachy and/or Crustok that applies upon Fortified Shell expiration. Increases all damage done.
Curse of Brachy/Crustok: Damage from the add increases. 15 second duration. Reapplied by Brachy/Crustok every 13 seconds on average. Reapplication range is 40 meters of Brachy and Crustok for each curse respectfully.
Defensive Blast: AOE around Brachy and Crustok. 40 meter radius (pulsating bubble). 2 seconds cast time every 10 seconds. Deals healable damage on the players inside each AOE. The more stacks of Curse players have, the more damage they will take from each add's blast. Standing in both at the same time results in death.
Pain Bringer: Brachy and Crustok will apply a debuff on a random player (excludes tanks). It deals damage around the target (red AOE). It will kill Scournests and Scourbites. Lasts 5 seconds.
Phase Three: 40%-0%
Boss Mechanics
The mechanics from phase 1 are present in phase 3.
Okadaic Poisoning: 5 second debuff applied on a random player (excluding tanks). Poison cloud. The player who received Okadaik Poisoning has 5 seconds to drop it away from the raid.
Hex of 6 is NO LONGER cast.
Okadaic Poisoning: 5 second debuff applied on a random player (excluding tanks). Poison cloud. The player who received Okadaik Poisoning has 5 seconds to drop it away from the raid.
Hex of 6 is NO LONGER cast.
Overview
Strategy
Face Pagura away from the raid and have the tanks stack. The raid should spread out or be divided in small camps (3 people) to catch Leaping Contagion.
The tanks need to pull Pagura towards the Scournests to cleave them down while picking up astray Scourbites. Requires the raid to adjust to position changes.
Have everyone catch every Curse of 4/5. Since this has been changed with 3.6#4 players standing in Curse of 4/5 no longer receive Cursed(debuff). The tanks should always eat these and should do the two slices coming out of the clamps while the dedicated players catch the ones in the back and later the side.
When casting Shattering Roar kill the Ice Soul and hide behind the pillar. Move away from the pillar once the cast has finished. Do not add more than one Ice Soul.
At 40% start DPSing Brachy and Krustok (either split into 10/10 or with the whole raid). Have each tank pick one up while one tank is standing outside picking up the spawning Scourbites. Kill them and the nests with Pain Bringer. If you decided to split 10/10 switch at 5 stacks of Curse of Brachy/Krustok. You can use a Beastmaster's defensive cooldowns to survive longer.
Once they are dead Pagura will reemerge.
From this point on it's the first phase again with the additional Okaid Poisining mechanic.
Tier 3 Raiding Lord Arak (2/9)
Useful Kalerts
Nerve Pinch warning (tanks)
---------------------------------------------
KA:MoM-Pagura-Nerve Pinch:auqsweNotjt0KgkAUhF+lJ7Bdy36YqyyFLlKxjW6EZdVVD4iCb
kFv30li5mLOXMx3IKHQjNVrxpZTzErs9LarjIaqAwTkUgpWTo3DxTizLh7XwpTUk/toqsZhLmrbU
G8nPZnW6rKntnPaeHU94+hLBAcf+8XSC3jp/jxlCFOl0ts5SlSUM4X9gwVi4f3rjeCndnz7iL8lO
TNH
Curse of Crustok Stacks
---------------------------------------
KA:MoM-Pagura-Curse of Crustok:asnSneNotjkEOgjAQRa/CCbQVUJNZVkjcuCC4a2LGUkwD
tKZTFsR4d9vGvFnMf38xAxx6eM+4aQ9pbSNi9aQLNxbCrxTcBNZZDSz2qWWRzowBLhhwL+9XiU8z
m7A9jHKW5KItKmNf3qE/7IaB4FSXUFcMqnMaHvlQQDXRF0Rz65sumqw5lCz/8Nc5HfPN9gcpPzQk
Curse of Brachy Stacks
---------------------------------------
KA:MoM-Pagura-Curse of Brachy:a/bFleNotjkEOwiAQRa/SEygoGpO/s7aJGxdN3ZGYkVIlV
jCAC2K8u5SYN4v57y9mwNHjNVHSHvPaZuq3D7pyY7X3pO4J1lkNluu5ZJnOjBEHirSU56Okq5lMT
BejnA3yqS0pY2/ekV/RYhgCOBcCG8EgdvPwzCdEUo/wRd2c+qbLpmiONStP/HVJ23K1/QE7BDQe
Pain Bringer
--------------------
KA:MoM-Pagura-Pain Bringer:aHiPBeNotjsEKwjAQRH/FL6ipJhbZW20KHrRS4i0QUptooCaS
BqF/76bIzGF5AzsDJQj4THoxEfLZom7a+U0dnX8i9MEbIJjlhKB6ZxM0OumtvJ+lHtzk0qLcI/hZ
ap9e5q2CVdbEb4hqKMZxhopRYPQI1S67LBi+63kDdSdEdznxq+A9InQuomTt+uM9wVWHtbv9AdVr
NFg
Okadaic Poisoning
-------------------------------
KA:MoM-Pagura-Okadaic Poisoning:a8yVgeNotjcEKwjAQRH/FL9BUa6HsTW2hB5tS460QNk3
VxZKIKUj9ejdFZg67b5cZSEDBa8R5eEMcS5Z8okXqV42n4B25OzjvBhD8EM+C1dJtghNOuOmuVYe
GRppmTb13oQsPtP6jDaOvNmtrAySJyGGfppBn0VtOamR1kTUcpFLyfCxqVbRM2VE7sTT9MW8KsqW
5/AGnrDWc
Loot Table
The loot table is complete, but is pending beautification. Please forgive our mess.
Note: All Nexian, Enigmatic, Ruin Forged and Nightmare Steel gear is convertible to Fortified (tank).
Normal Mode
1 Earring
1 Belt
Belt
Nightmare Steel Girdle - Warrior DPS - PC288
Fortified Nightmare Steel Girdle - Warrior Tank - BL288
Ruin Forged Buckle - Cleric DPS - SCH288
Fortified Ruin Forged Buckle - Cleric Tank - BL288
Enigmatic Leather Belt - Rogue DPS - PC288
Fortified Enigmatic Leather Belt - BL288
Nexian Silk Sash - Mage DPS - SCH288
Fortified Nexian Silk Sash - Mage Tank - BL288
Earring
Nightmare Steel Loop - Warrior DPS - AP120
Fortified Nightmare Steel Loop - Warrior Tank - DO135
Ruin Forged Ornament - Cleric DPS - SP120
Fortified Ruin Forged Ornament - Cleric Tank - DO135
Enigmatic Bauble - Rogue DPS - AP120
Fortified Enigmatic Bauble - Rogue Tank - DO135
Nexian Sigil - Mage DPS - SP120
Fortified Nexian Sigil - DO135
HTML Comment Box is loading comments...
